Set up SCIM provisioning from Microsoft Entra
This page guides you through setting up SCIM provisioning from Microsoft Entra to Ory Network.
Create a SCIM App in MS Entra
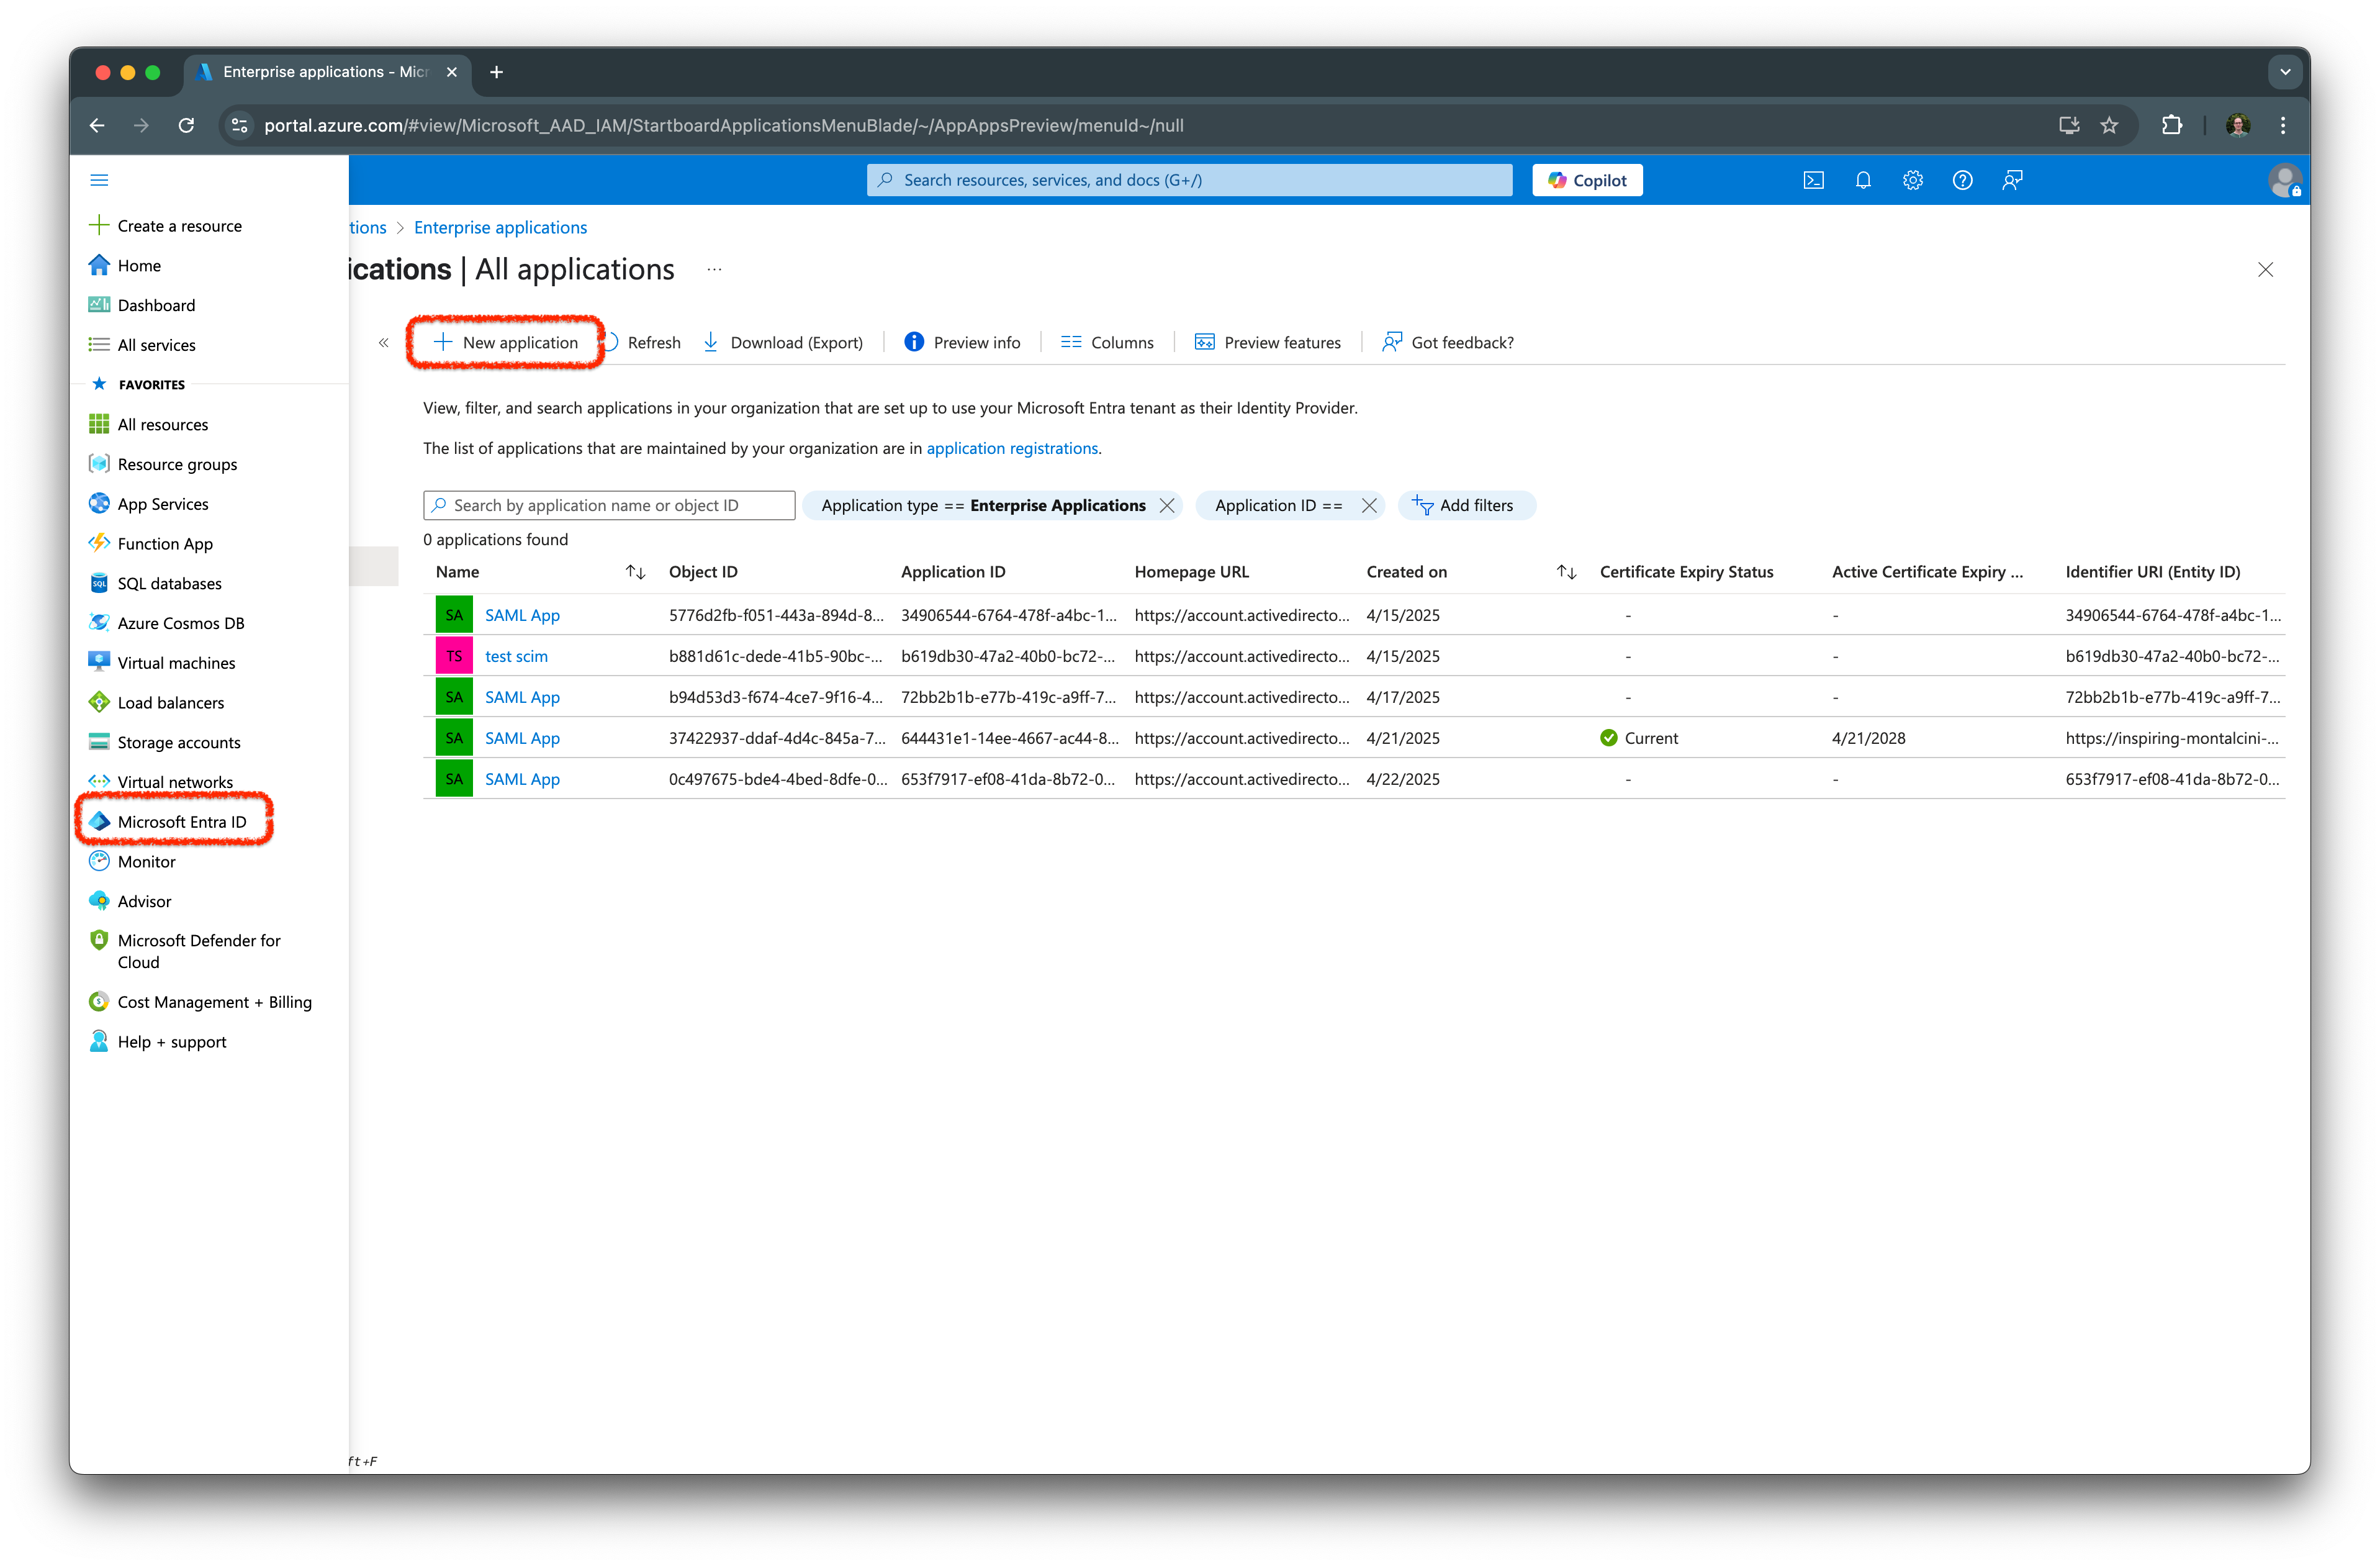
From the Azure admin dashboard, navigate to Microsoft Entra ID > Enterprise applications and create a new application by clicking on Create your own application.
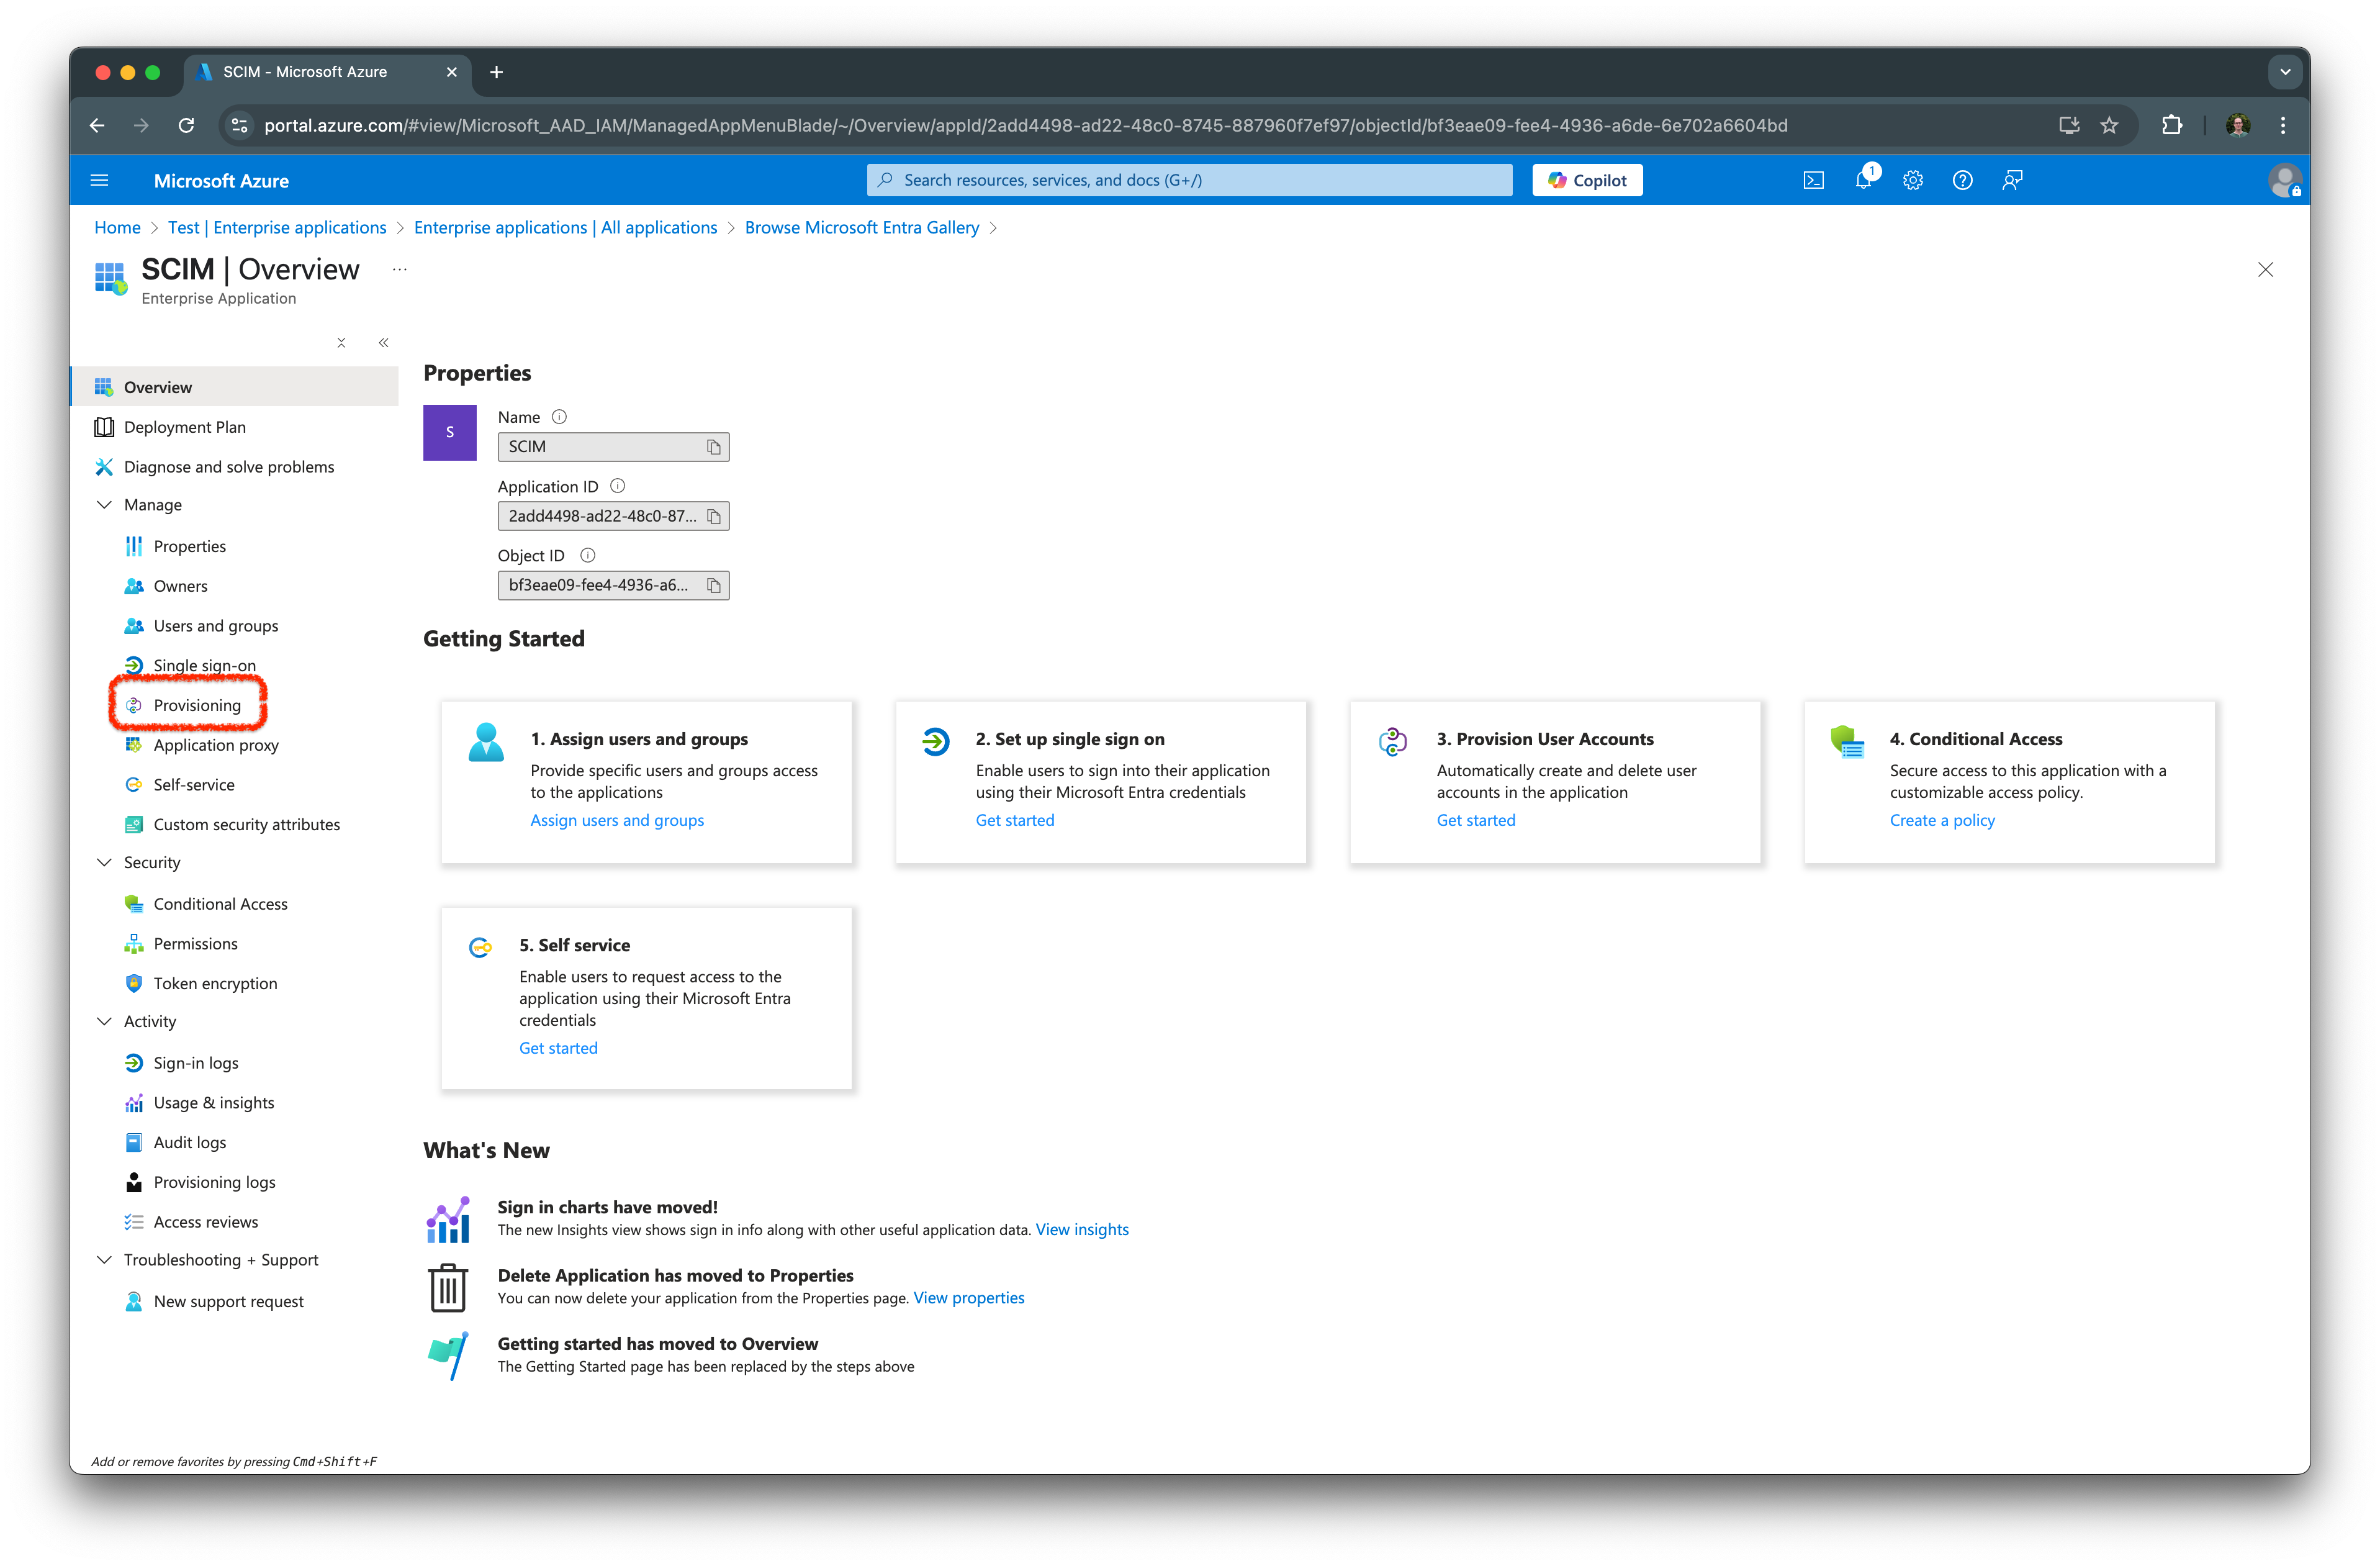
In the app screen, select Provisioning.
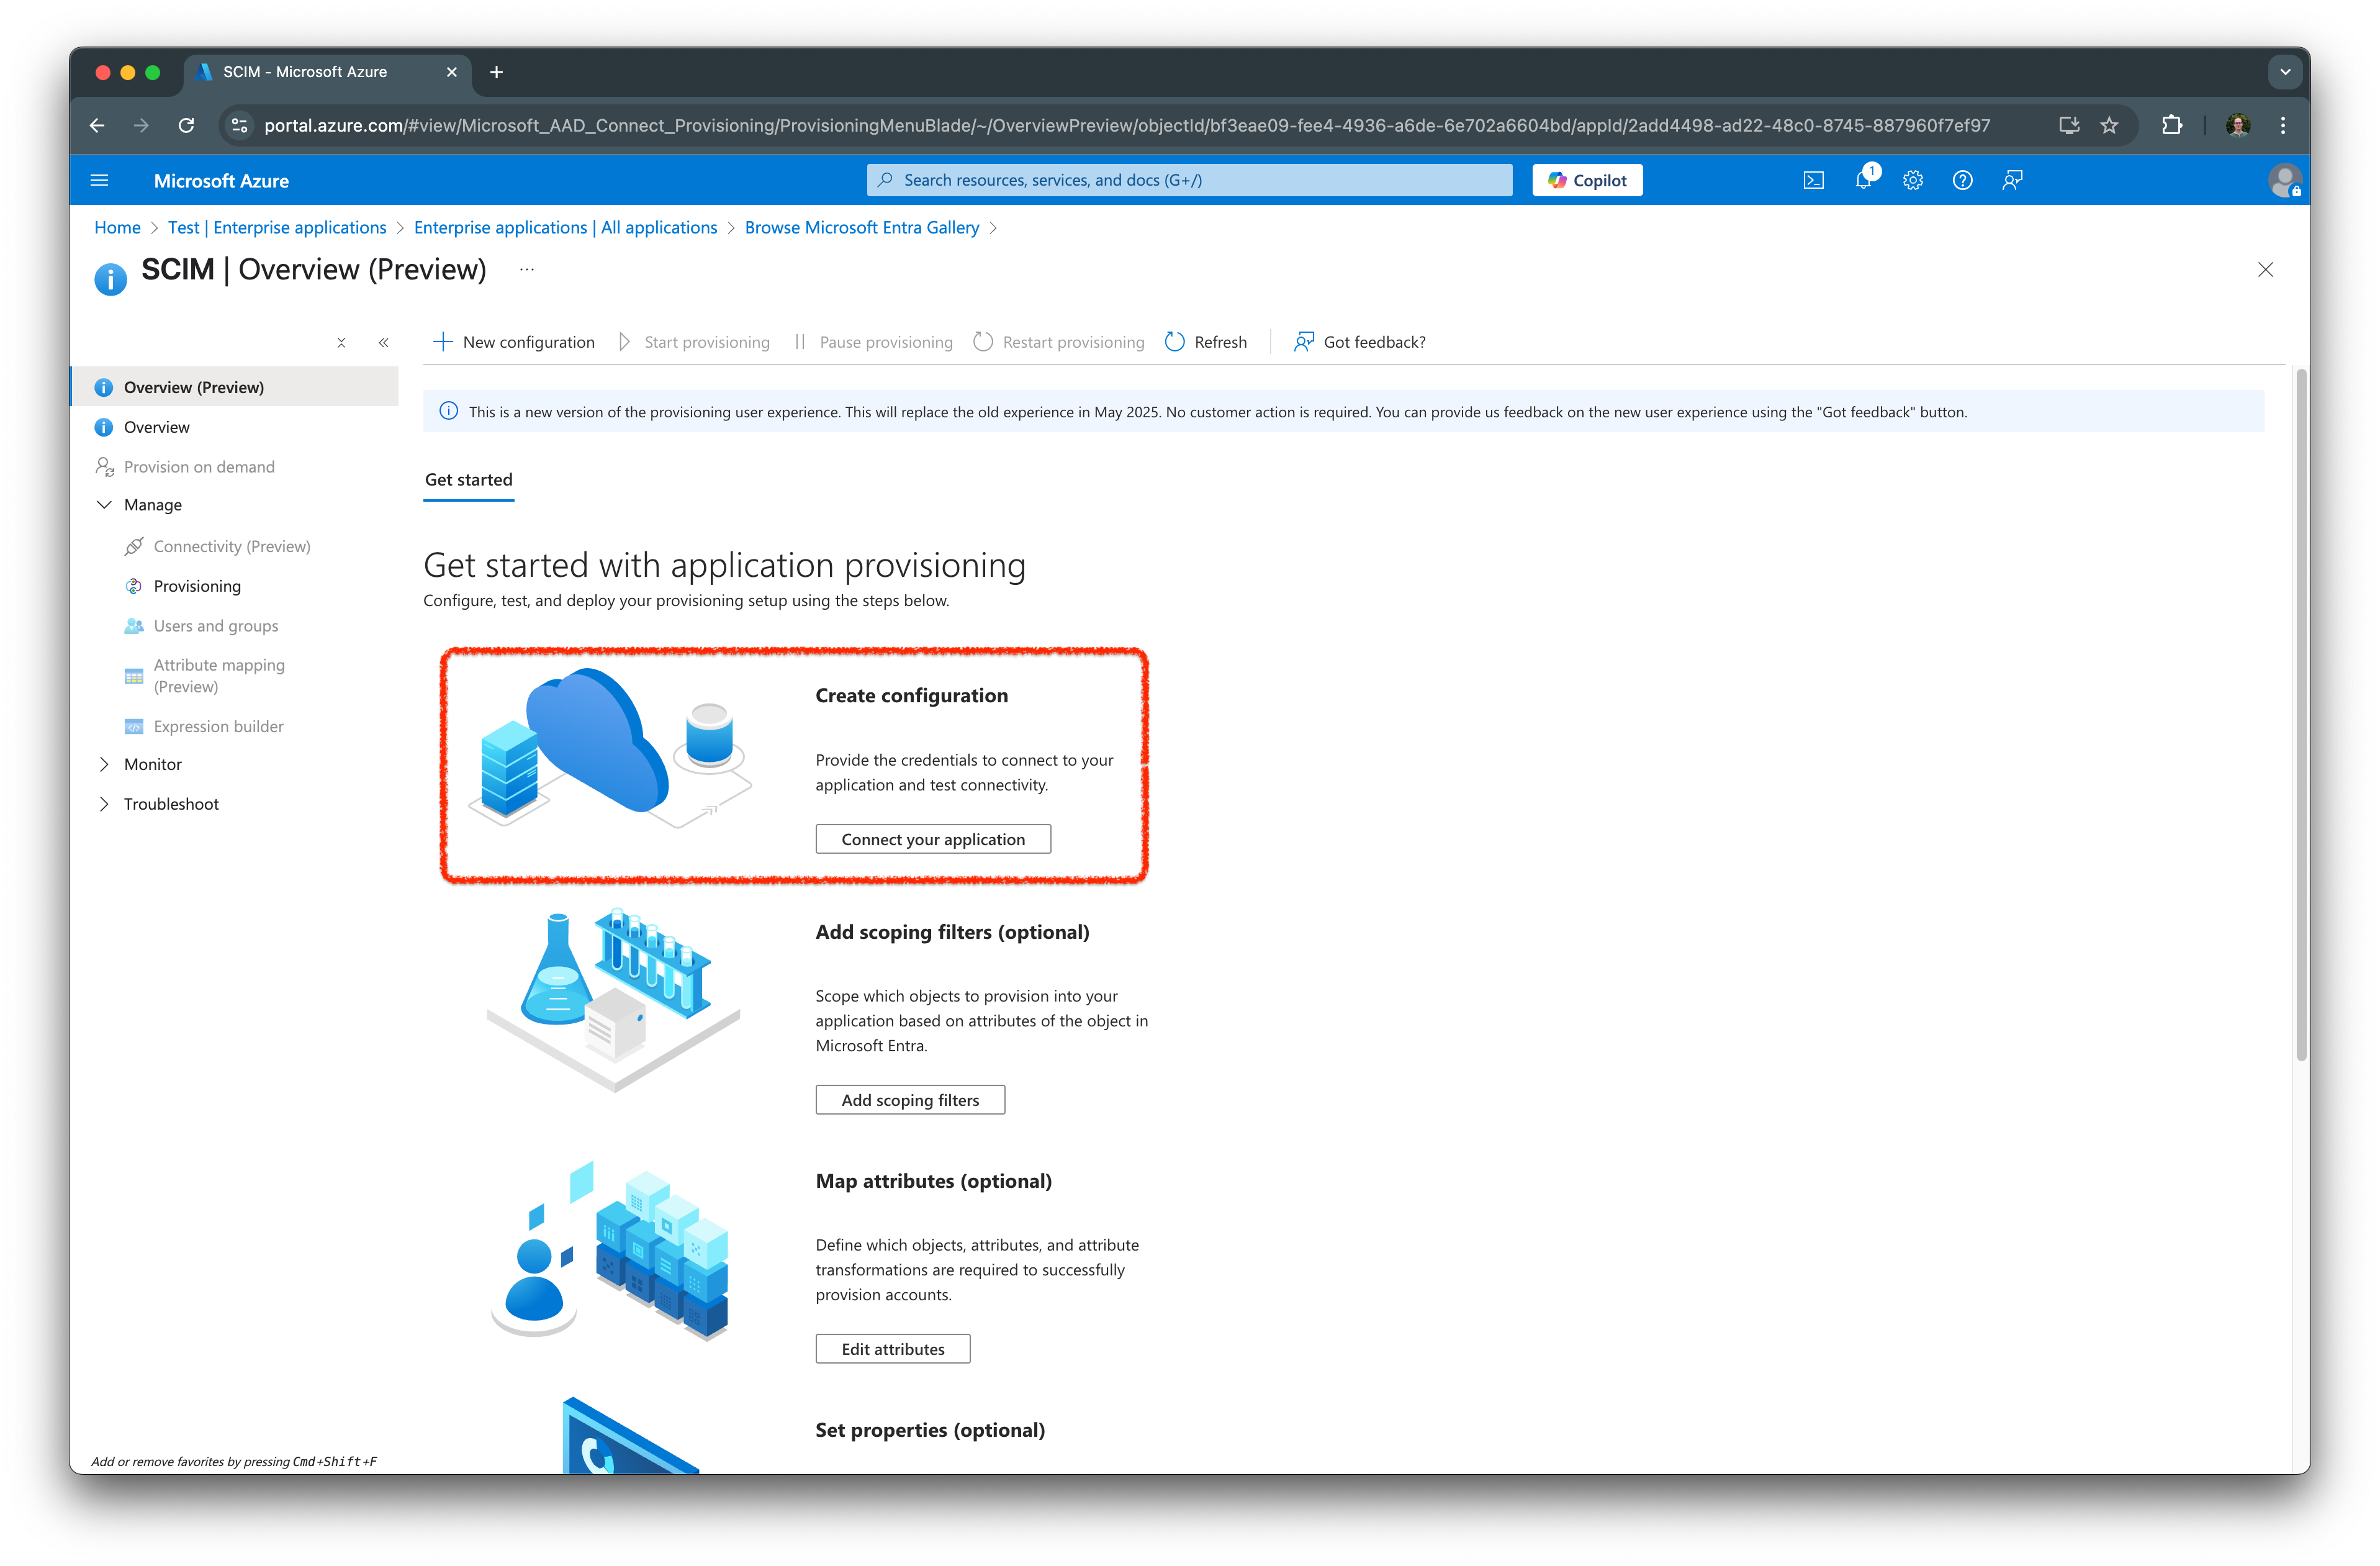
Next, select Create configuration.
Set up provisioning
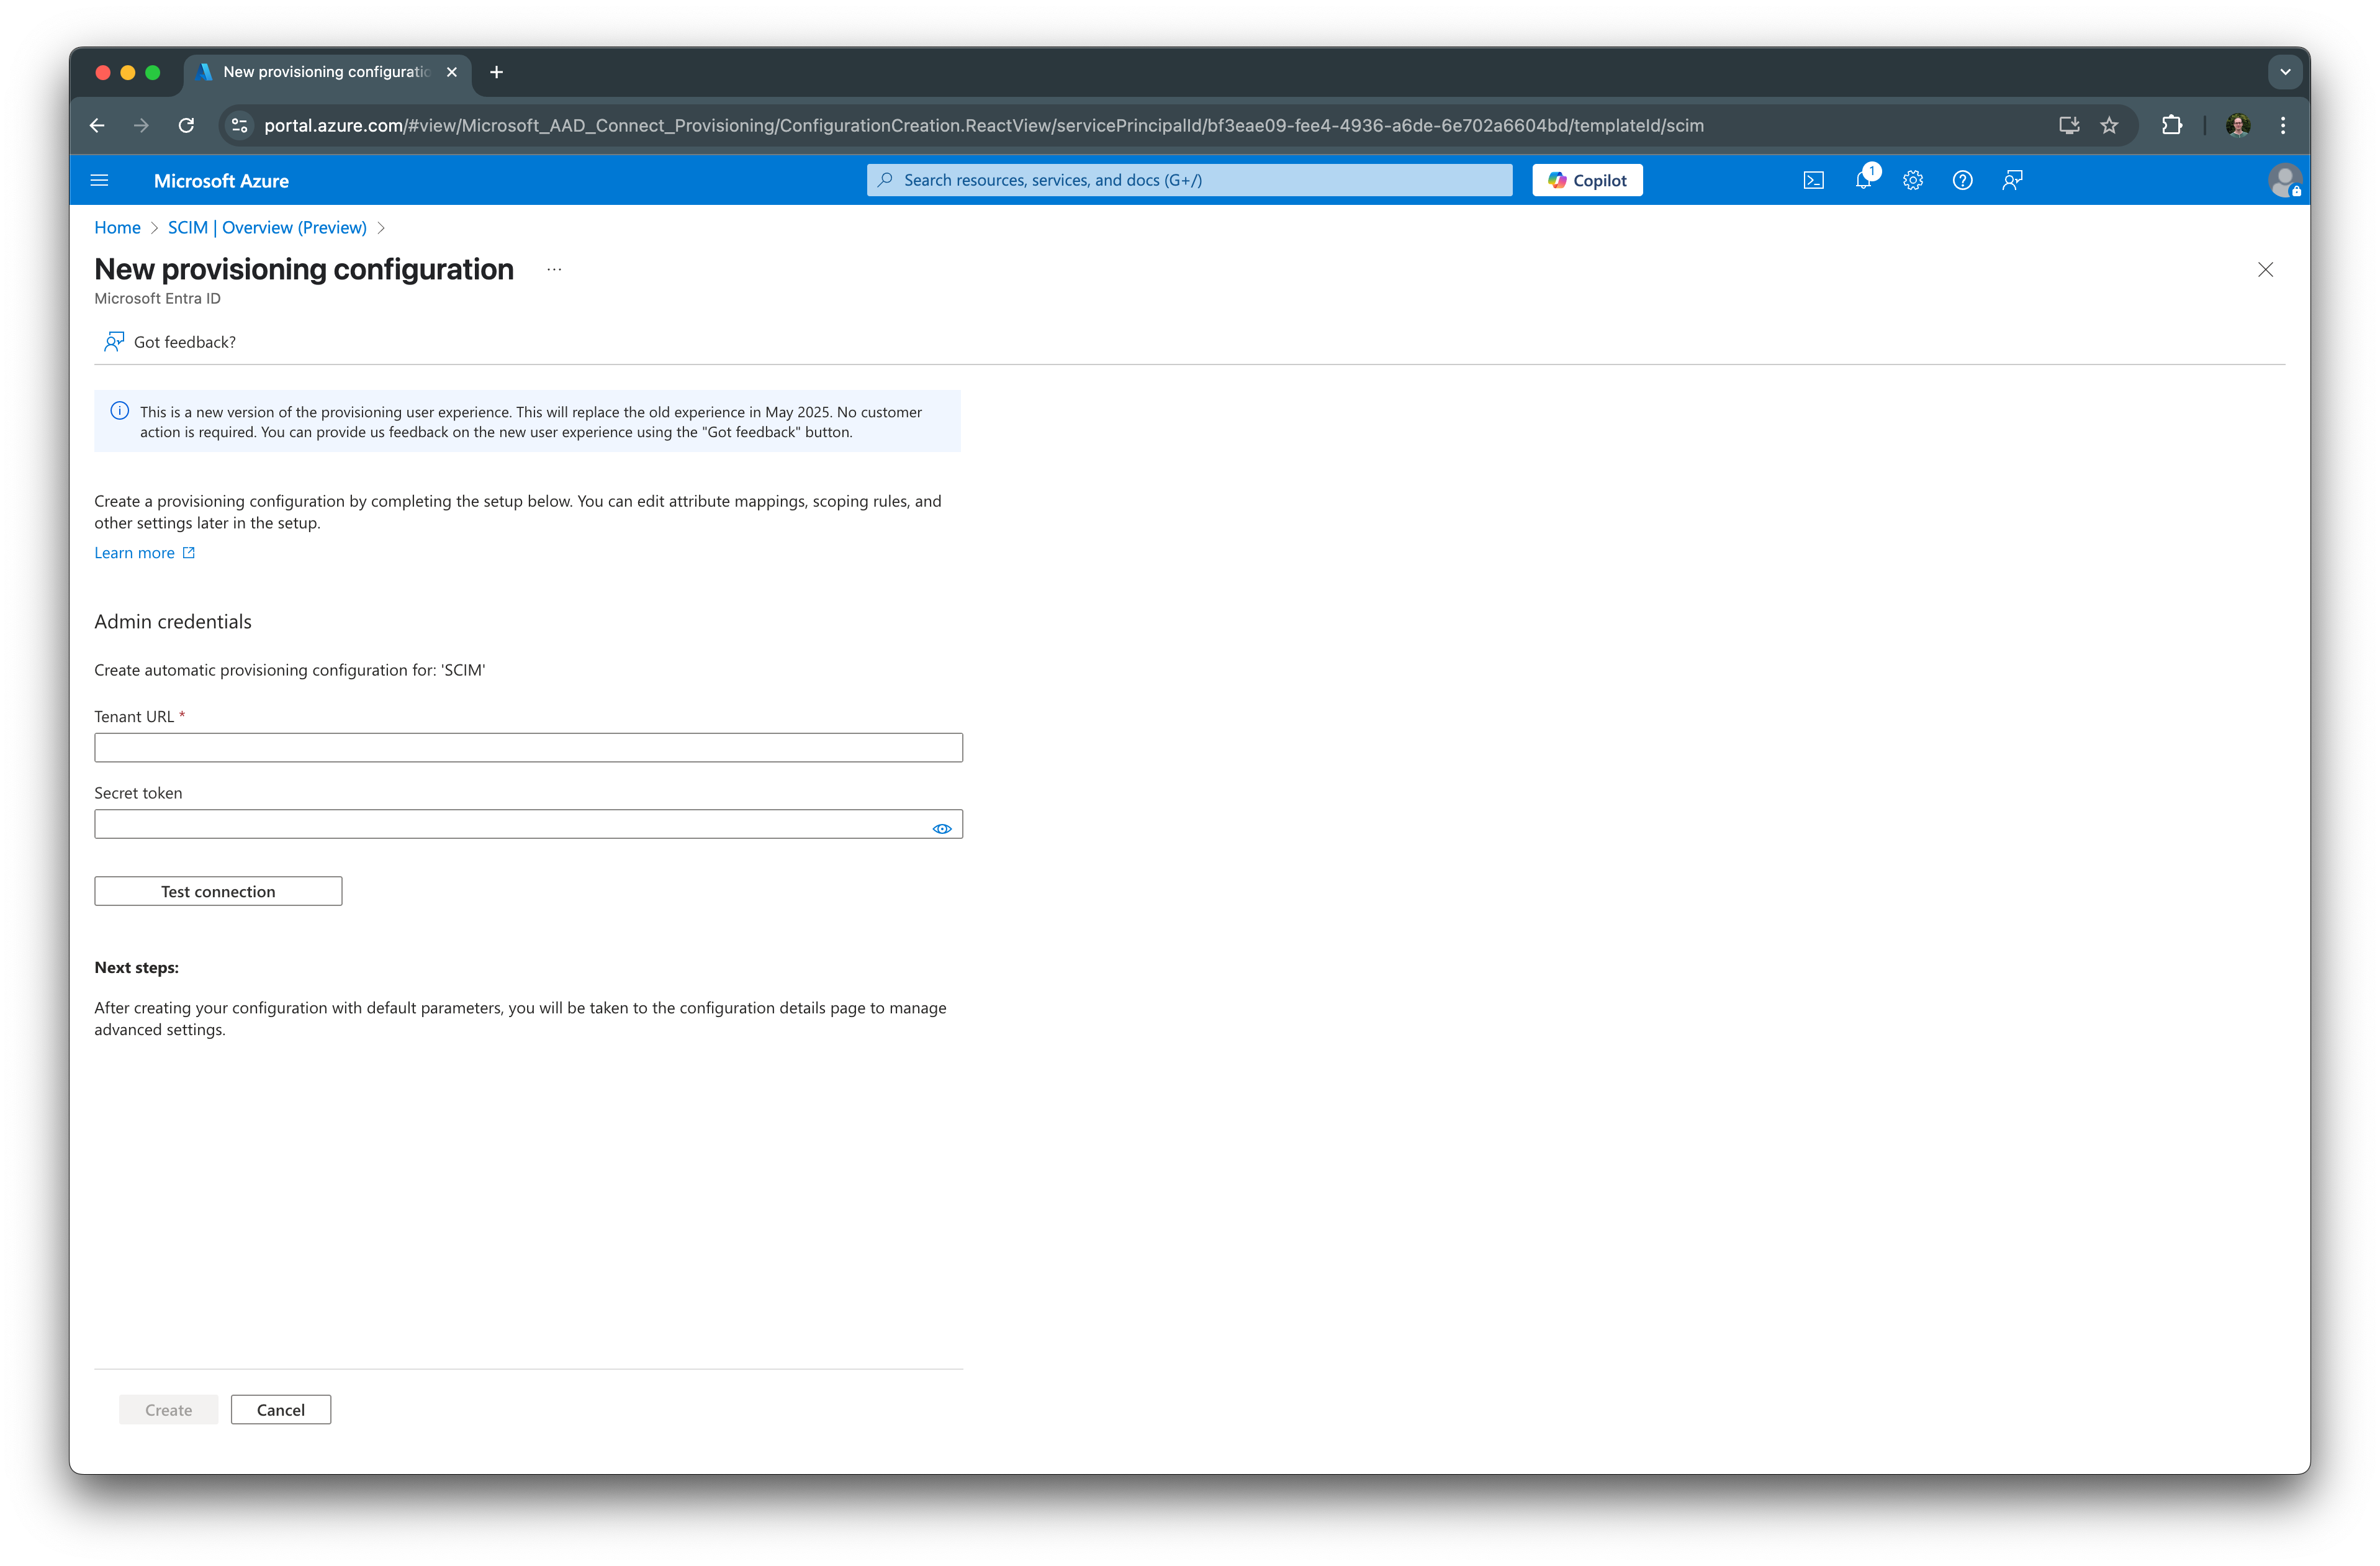
In the provision configuration screen, enter the SCIM server URL from your Ory Network SCIM server, and for the API token,
excluding the Bearer prefix, enter the SCIM token you created in the Ory Network.
For example, if in Ory Network you've set the token to Bearer secret, enter secret in the API token field.
Click on Test Connection to verify the connection. If successful, you should see a success message.
Configure assignments
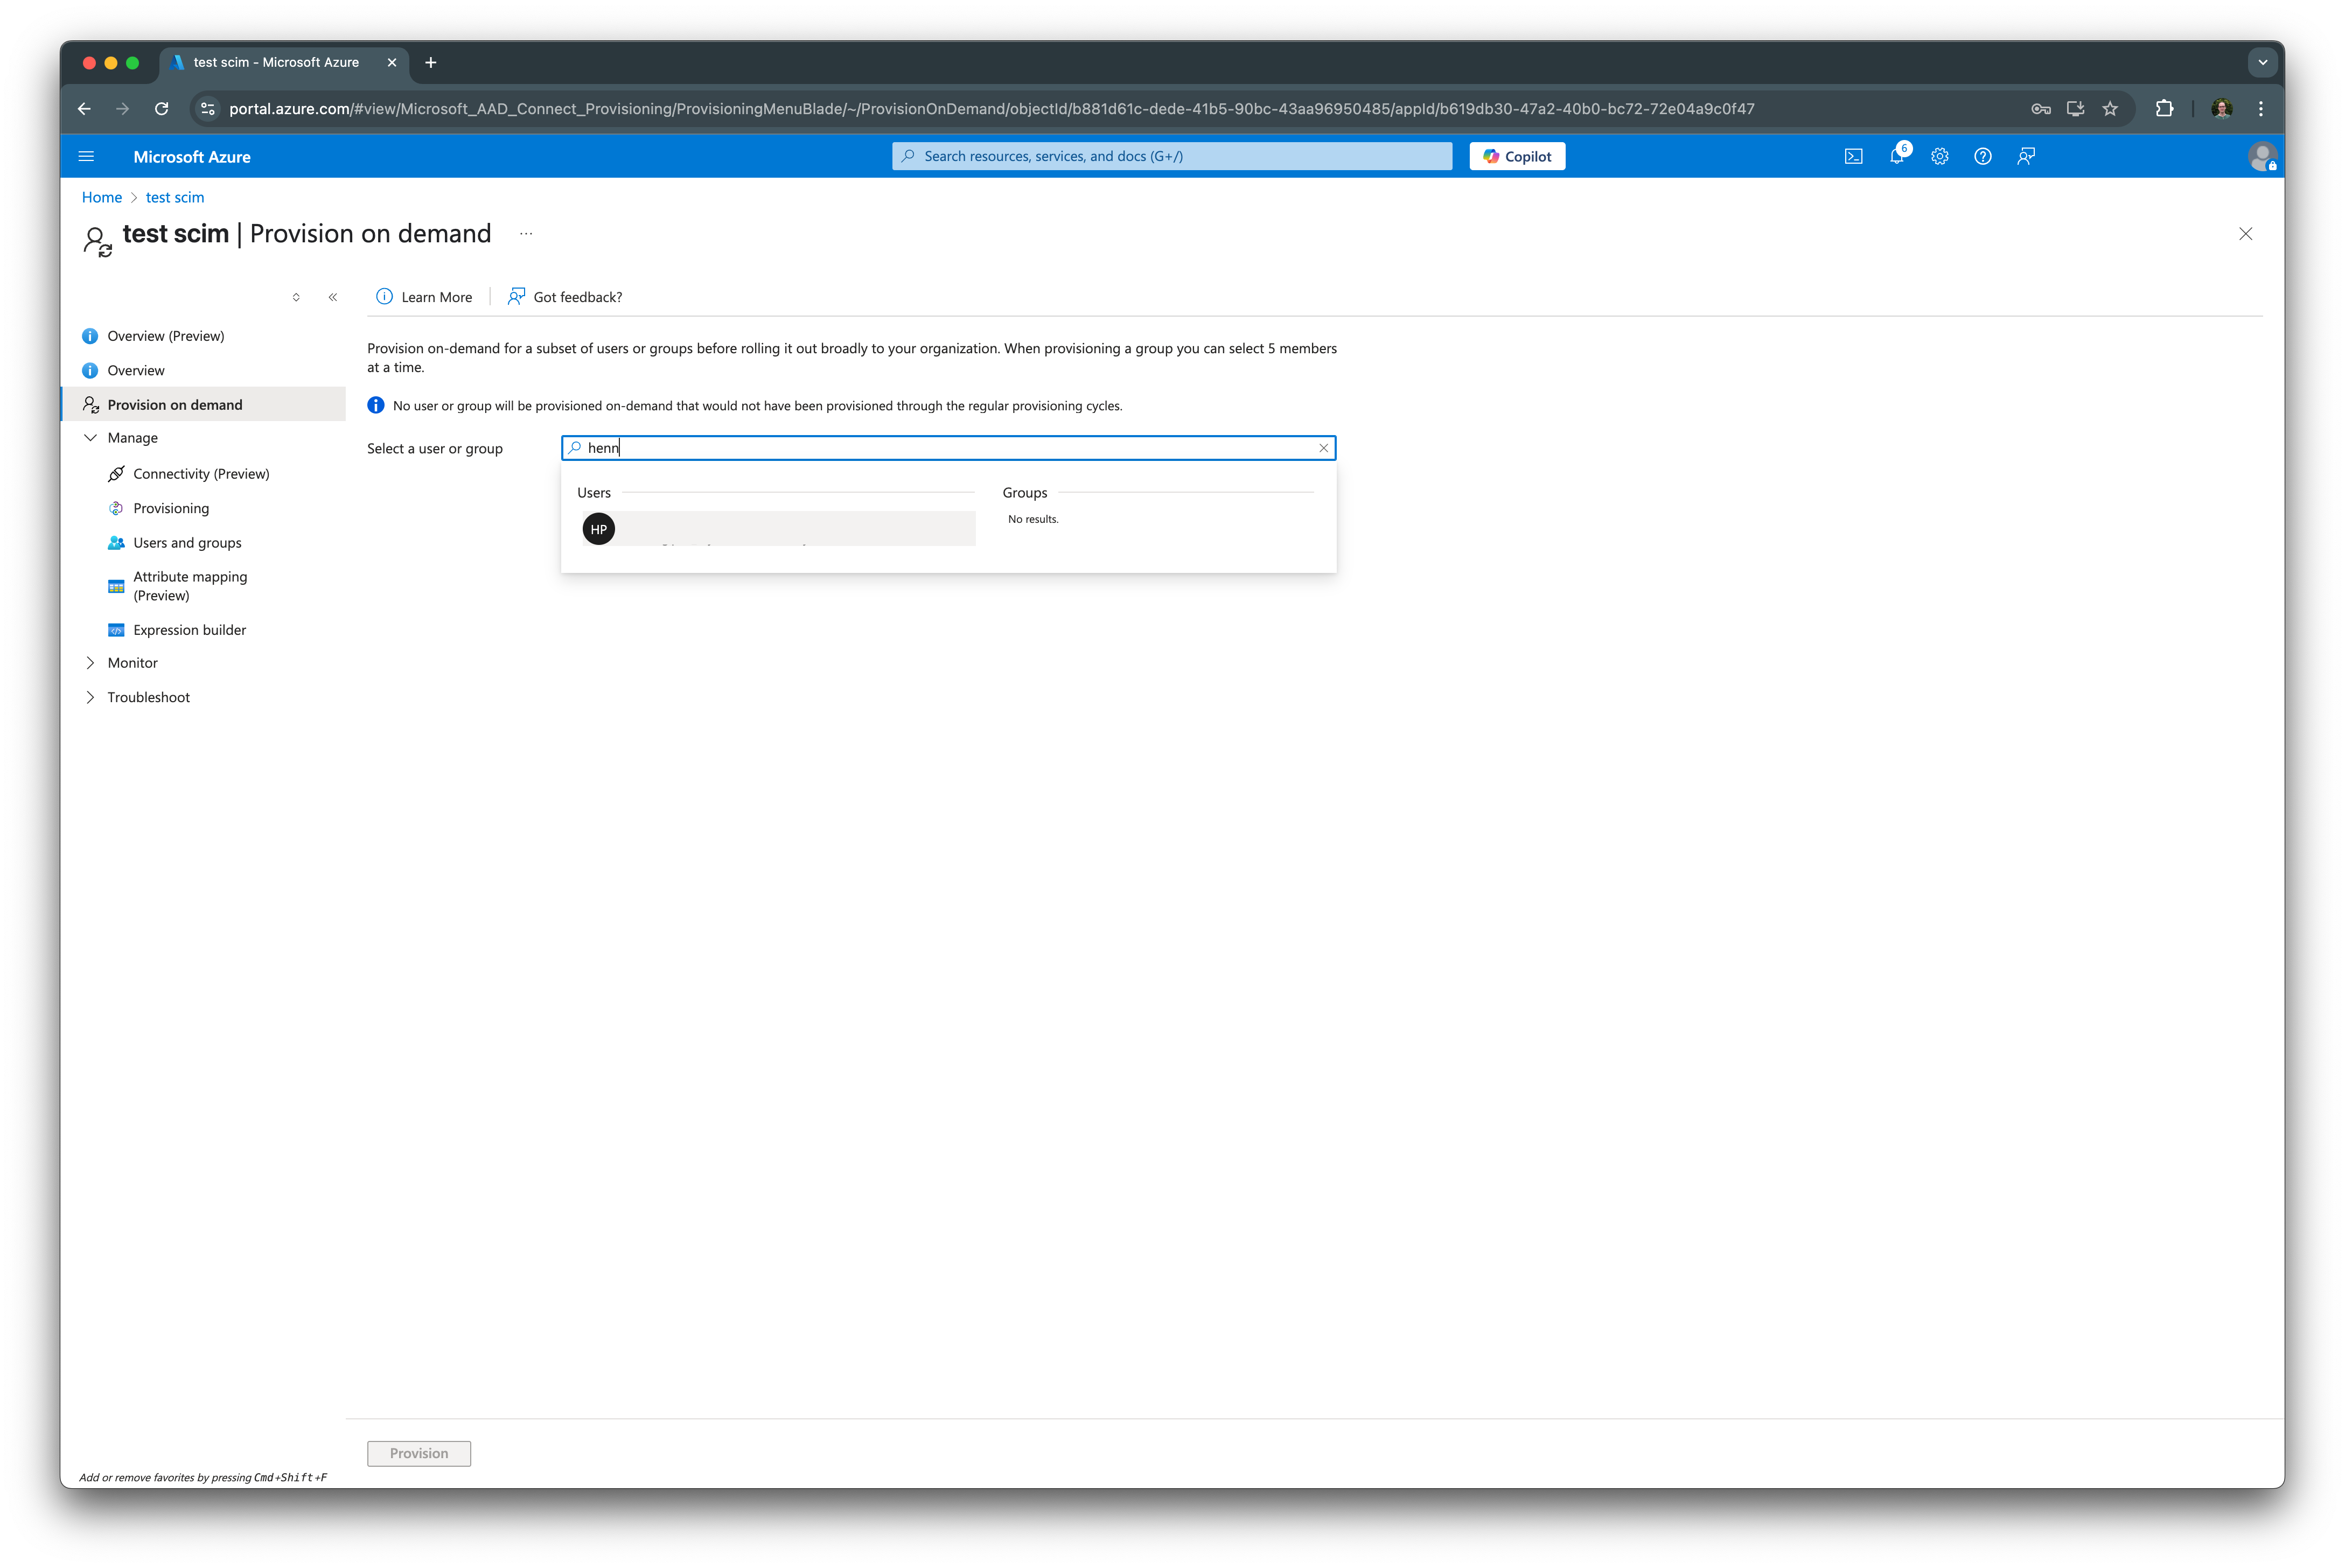
Next, provision users through SCIM by clicking on Provision on demand, and enter a user name into the search box. Click on the user to start the provisioning process. If successful, you should see a success message.
Verify provisioning
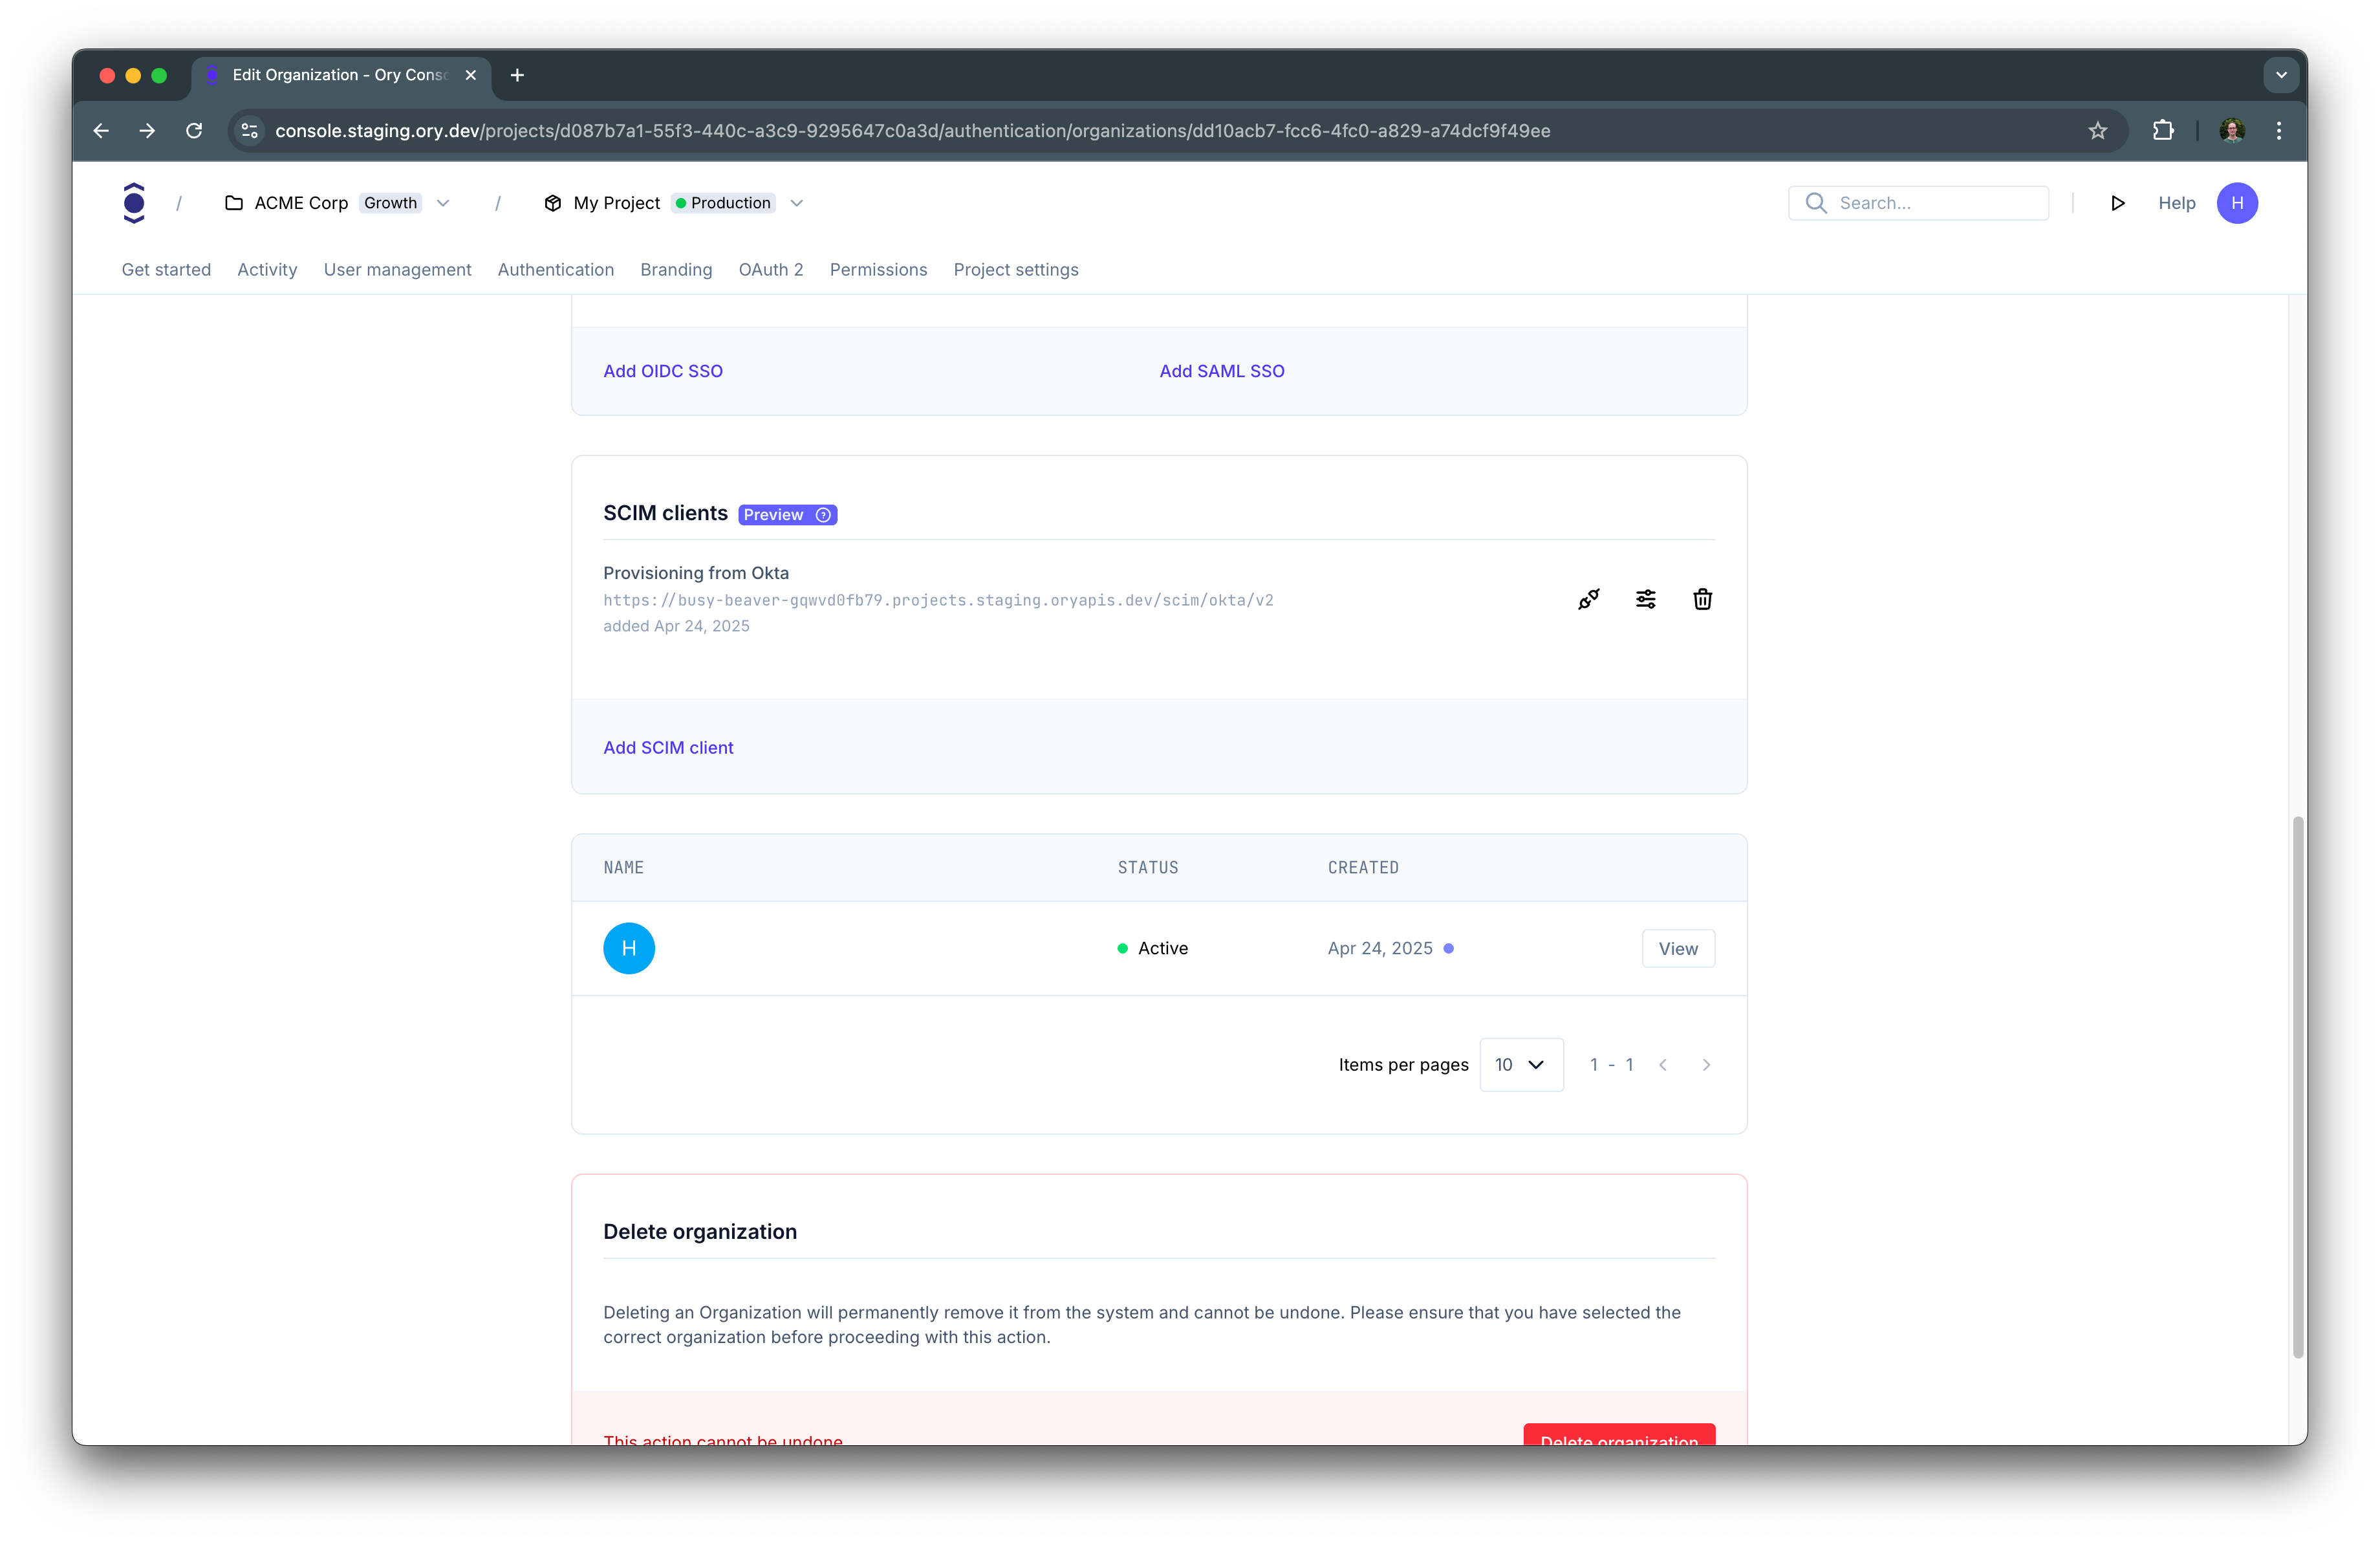
After completing the assignment, navigate to the Ory Network SCIM server and verify that the users have been provisioned:
Troubleshooting
When the provisioning fails, the error will be logged. In Ory Network, navigate to Activity > Logs & Events and look for
SCIM provisioning error events.